Dot nail art designs have become increasingly popular in recent years, offering a versatile and creative way to enhance your nail art game. Whether you're a beginner or an experienced nail artist, dots can add a playful yet sophisticated touch to your manicure. From simple polka dots to intricate geometric patterns, dot designs are endlessly customizable and fun to create.
As the world of nail art continues to evolve, dot nail art designs have emerged as a timeless trend that never goes out of style. This versatile technique allows you to experiment with colors, shapes, and textures, making it perfect for both casual and formal occasions. Whether you're looking to add a pop of color to your nails or create an intricate masterpiece, dot designs offer endless possibilities.
In this comprehensive guide, we'll explore everything you need to know about dot nail art designs. From essential tools and techniques to step-by-step tutorials, we'll cover all aspects of creating stunning dot designs on your nails. Let's dive in!
Read also:Kanye Buff Exploring The Genius And Legacy Of Kanye West
Table of Contents
- Introduction to Dot Nail Art
- Tools You Need for Dot Nail Art
- Basic Techniques for Creating Dots
- Choosing the Right Color Combinations
- Popular Dot Nail Art Designs
- Step-by-Step Tutorials for Dot Designs
- Common Mistakes to Avoid
- Maintenance Tips for Dot Nail Art
- Inspiration Ideas for Your Next Dot Design
- Conclusion: Start Creating Your Dot Nail Art Today
Introduction to Dot Nail Art
Dot nail art designs have become a staple in the world of beauty and fashion. This technique involves creating small circular patterns on the nails using various tools and methods. The simplicity of dot designs makes them accessible to both beginners and professionals, allowing everyone to express their creativity through nail art.
One of the key advantages of dot nail art is its versatility. You can create simple polka dots for a playful look or combine dots with other elements like stripes, flowers, or geometric shapes for a more intricate design. The possibilities are endless, and with the right tools and techniques, you can achieve professional-looking results at home.
Why Dot Nail Art Is Trending
The trend of dot nail art designs can be attributed to several factors. First, dots are easy to create, even for those who are new to nail art. Second, they offer a wide range of customization options, allowing you to experiment with different colors, sizes, and patterns. Lastly, dot designs can complement various nail styles, from minimalist to bold and extravagant.
Tools You Need for Dot Nail Art
To create stunning dot nail art designs, you'll need the right tools. Here's a list of essential items to get you started:
- Dotting tool: A small, rounded tool specifically designed for creating dots on nails.
- Nail polish: Choose a variety of colors to create your desired design.
- Base coat: Protects your nails and ensures the polish adheres properly.
- Top coat: Seals the design and provides a glossy finish.
- Stickers or stencils: Optional tools for creating precise patterns.
- Clean-up brush: Helps tidy up mistakes and clean around the nail edges.
Investing in Quality Tools
While you can start with basic tools, investing in high-quality items can significantly improve your results. Look for dotting tools made from durable materials and with precise tips for better control. Similarly, choose nail polishes that are easy to apply and provide vibrant colors.
Basic Techniques for Creating Dots
Mastering the basics of dot nail art is essential for creating stunning designs. Here are some fundamental techniques to help you get started:
Read also:Vegamoviesto Your Ultimate Destination For Streaming Movies Online
1. Using a Dotting Tool: Dip the dotting tool into your chosen nail polish color and gently press it onto the nail to create a dot. Adjust the pressure to control the size of the dot.
2. Layering Colors: Experiment with layering different colors to create depth and dimension in your design. Allow each layer to dry before adding the next one to prevent smudging.
3. Creating Patterns: Combine dots of varying sizes and colors to form patterns such as polka dots, chevrons, or floral motifs.
Tips for Perfect Dots
Here are some additional tips to help you create flawless dots:
- Use a thin layer of polish on your dotting tool for better control.
- Practice on a piece of paper before applying dots to your nails.
- Work on one nail at a time to ensure each dot is placed accurately.
Choosing the Right Color Combinations
Color plays a crucial role in dot nail art designs. The right combination can elevate your design and make it stand out. Consider the following tips when selecting colors:
1. Complementary Colors: Use colors that complement each other on the color wheel for a harmonious look. For example, pair blue with orange or green with red.
2. Monochromatic Palette: Stick to shades of the same color for a sophisticated and cohesive design.
3. Contrasting Colors: Add a pop of contrast by pairing bold colors like black and white or neon and pastel hues.
Seasonal Color Trends
Stay updated with the latest color trends to keep your dot nail art designs fresh and modern. For instance, warm earthy tones are popular in autumn, while bright pastels are ideal for spring and summer.
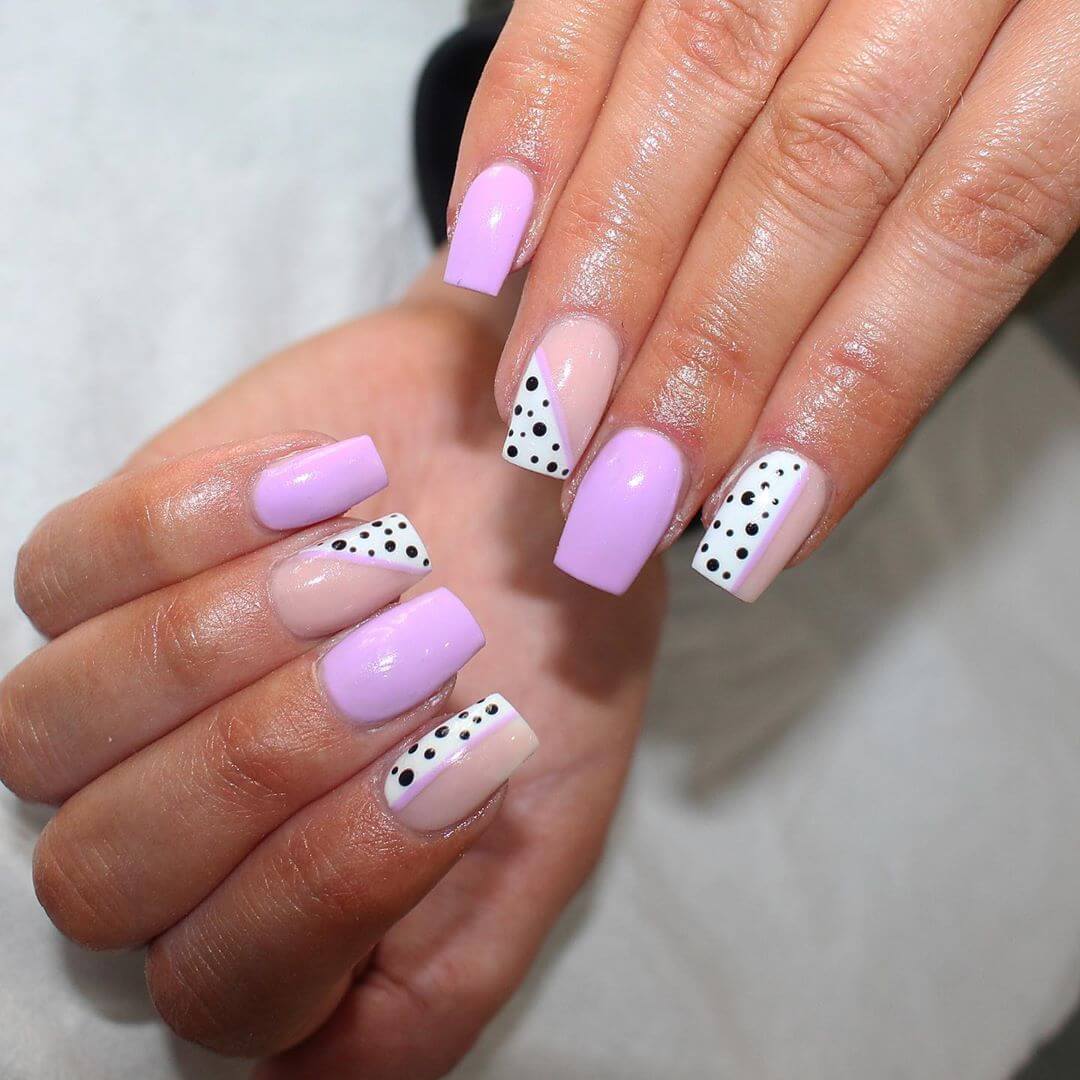
Popular Dot Nail Art Designs
There are countless dot nail art designs to explore. Here are some popular ideas to inspire your creativity:
- Polka Dot Nails: A classic and playful design featuring evenly spaced dots.
- Geometric Patterns: Combine dots with straight lines to create modern geometric shapes.
- Floral Motifs: Use dots to form petals and centers of flowers for a delicate look.
- Ombré Dots: Gradually transition colors within the dots for a gradient effect.
Customizing Your Design
Feel free to personalize your dot nail art designs by incorporating your favorite colors, patterns, or themes. Whether you prefer minimalist designs or bold, eye-catching patterns, the possibilities are endless.
Step-by-Step Tutorials for Dot Designs
Here are step-by-step tutorials for creating two popular dot nail art designs:
Polka Dot Nails
- Apply a base coat to protect your nails.
- Paint your nails with a solid color of your choice.
- Use a dotting tool to create evenly spaced dots in a contrasting color.
- Allow the design to dry completely and finish with a top coat.
Geometric Patterns
- Start with a base coat and paint your nails in a neutral color.
- Use a dotting tool to create dots in a geometric pattern, such as triangles or diamonds.
- Add straight lines with nail polish and a fine brush to connect the dots.
- Seal the design with a top coat for a polished finish.
Common Mistakes to Avoid
Even experienced nail artists can make mistakes when creating dot nail art designs. Here are some common pitfalls to avoid:
- Using too much polish on your dotting tool, which can cause the dots to spread and lose their shape.
- Not allowing each layer to dry before adding the next one, leading to smudging.
- Ignoring the importance of a base coat and top coat, which can affect the longevity and appearance of your design.
How to Fix Mistakes
If you make a mistake, don't worry! You can fix most errors by using a clean-up brush dipped in nail polish remover to gently erase the unwanted parts. Alternatively, start over on a fresh nail canvas if necessary.
Maintenance Tips for Dot Nail Art
To ensure your dot nail art designs last as long as possible, follow these maintenance tips:
- Apply a top coat every few days to protect the design and prevent chipping.
- Keep your nails clean and moisturized to maintain their health and appearance.
- Avoid exposing your nails to harsh chemicals or excessive water, which can damage the polish.
Refreshing Your Design
If your dot nail art starts to fade or chip, consider refreshing it by applying a new layer of polish or touch-up dots. This will help maintain the integrity of your design.
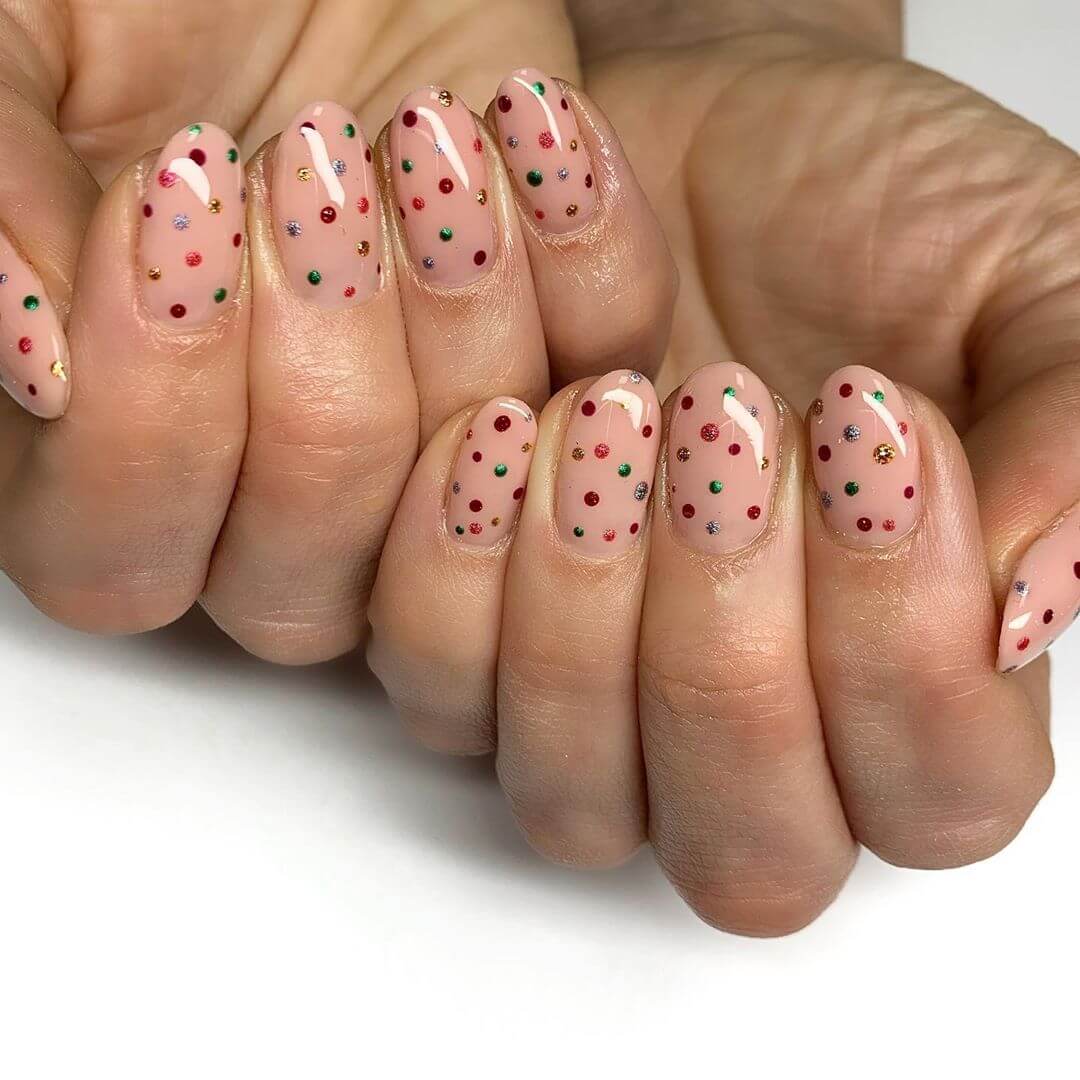
Inspiration Ideas for Your Next Dot Design
Looking for inspiration for your next dot nail art design? Here are some ideas to spark your creativity:
- Create a galaxy-inspired design by layering dots in various shades of blue, purple, and silver.
- Design a tropical theme with dots resembling palm leaves and flowers.
- Experiment with metallic dots for an elegant and luxurious look.
- Incorporate holiday-themed dots for festive occasions, such as red and green dots for Christmas.
Exploring New Trends
Stay ahead of the curve by exploring the latest trends in dot nail art designs. Follow nail art influencers and blogs to discover innovative techniques and ideas.
Conclusion: Start Creating Your Dot Nail Art Today
Dot nail art designs offer endless possibilities for creativity and self-expression. By mastering the basics and experimenting with different techniques, colors, and patterns, you can create stunning designs that reflect your personal style. Remember to invest in quality tools, practice regularly, and maintain your nail art for long-lasting results.
We encourage you to share your dot nail art creations with the world. Leave a comment below to let us know what designs you've tried or plan to create. Don't forget to explore our other nail art tutorials and articles for more inspiration and tips. Happy creating!